Garden Edging Ideas: The Ultimate NZ Landscape Design Guide
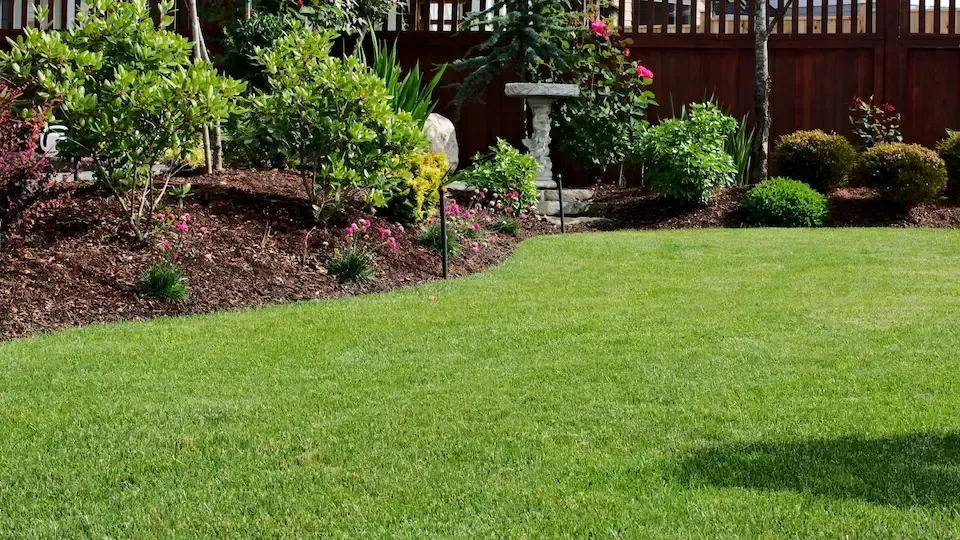
Is there anything more satisfying than seeing your garden in full bloom? A thriving tapestry of textures bursting with life and an abundance of colour. Magnificent gardens are as good for the soul as they are for nature.
However, anyone who has tried to tame a Kiwi quarter-acre knows the truth: to get a garden looking its best requires intervention. Without structure, a garden is just a collection of plants fighting for space.
The key to unlocking that "magazine look" lies in the planning. If you are new to landscape design, the sheer choice of options can seem overwhelming. Which plants should you choose? Should you have curved or straight lines? How do you stop the Kikuyu grass from invading your prize winning roses?
In this guide, we are going deeper than the basics. We are going to explore specific garden edging ideas, design styles, and the practical steps to giving your outdoor space a professional backbone.
Why garden edging matters (More than just tidiness)
Garden edging is an instant way to transform your outdoor space, but its role goes far beyond aesthetics.
- Visual Clarity: It creates clean lines that guide the eye, making small gardens feel bigger and messy gardens feel curated.
- The Physical Barrier: It prevents aggressive grass runners (rhizomes) from spreading into flower beds.
- Mulch Retention: In windy NZ regions (looking at you, Wellington and Canterbury), edging acts as a retaining wall for your mulch, keeping moisture in the soil where it belongs.
Whether you’re designing from scratch or retrofitting an existing garden, here are the 7 steps to mastering landscape design.
Step 1: What’s your garden design style?
Before you dig a trench, you need a theme. Choosing your style influences every hard landscaping decision you make—from the colour of your steel to the shape of your path.
Here are three popular NZ garden edging ideas and how to achieve them:
1. The Formal / Classic Look
This style is all about control, symmetry, and order.
- The Vibe: English country estate meets Christchurch manicured lawn.
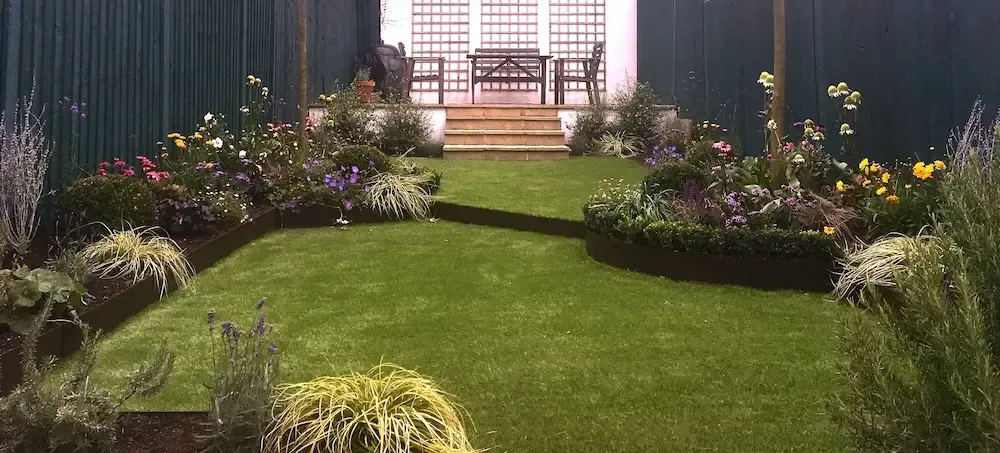
- The Layout: Geometric shapes. Rectangular lawns, straight paths, and perfect circles.
- The Edging Choice: Classic Galvanised or Black Steel. You want rigid lines that don't waver. Steel is superior to timber here because it creates a razor-sharp 90-degree corner that timber can never quite match.
- Plant Pairing: Low Buxus hedging, standard roses, and white hydrangeas.
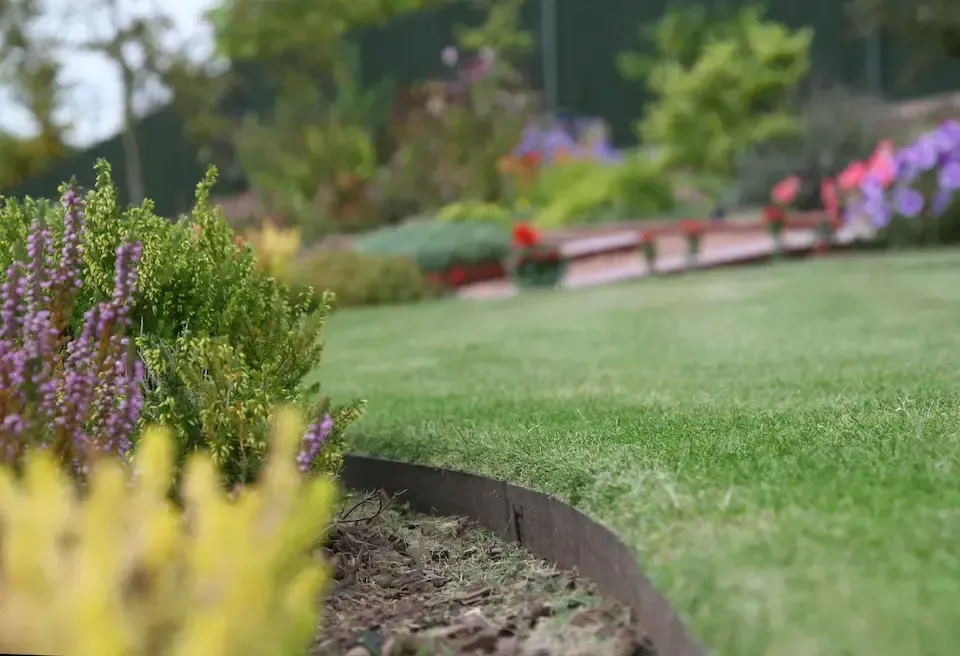
2. The Rustic / Naturalist Look
This style embraces the landscape rather than trying to tame it completely.
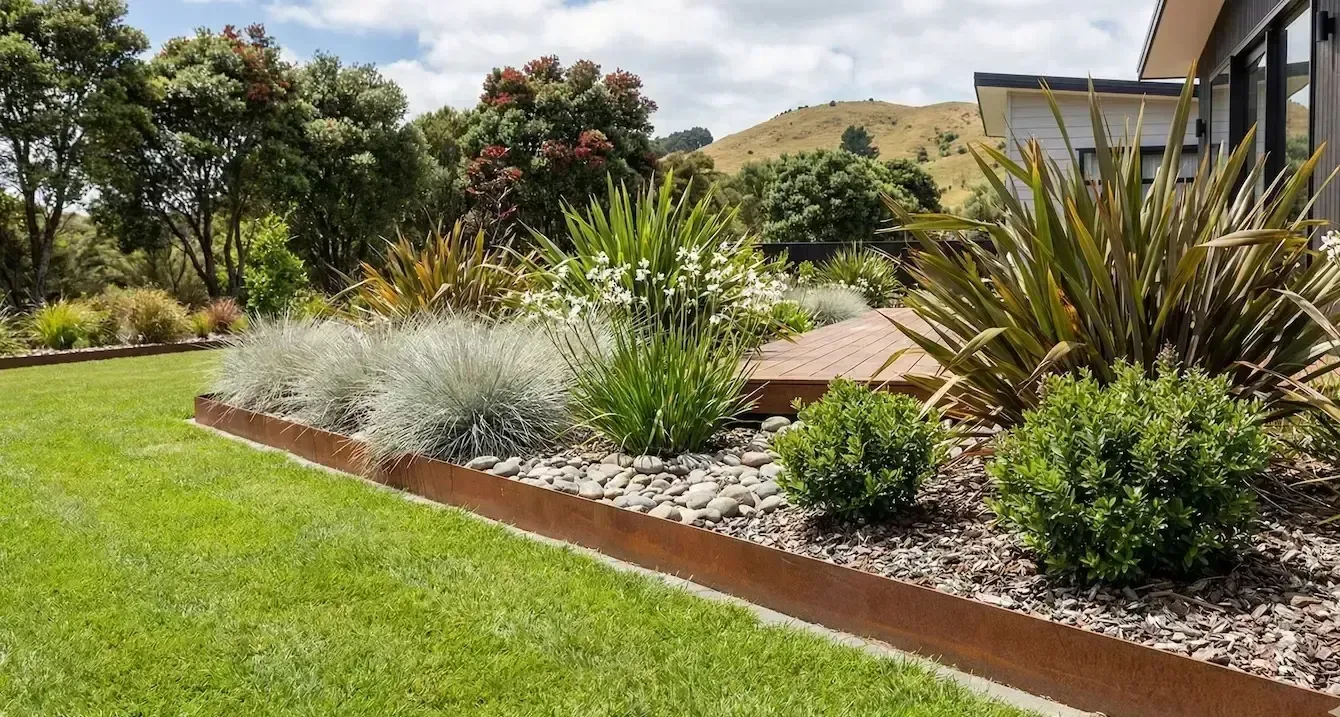
- The Vibe: Central Otago tussock lands or a coastal Bach garden.
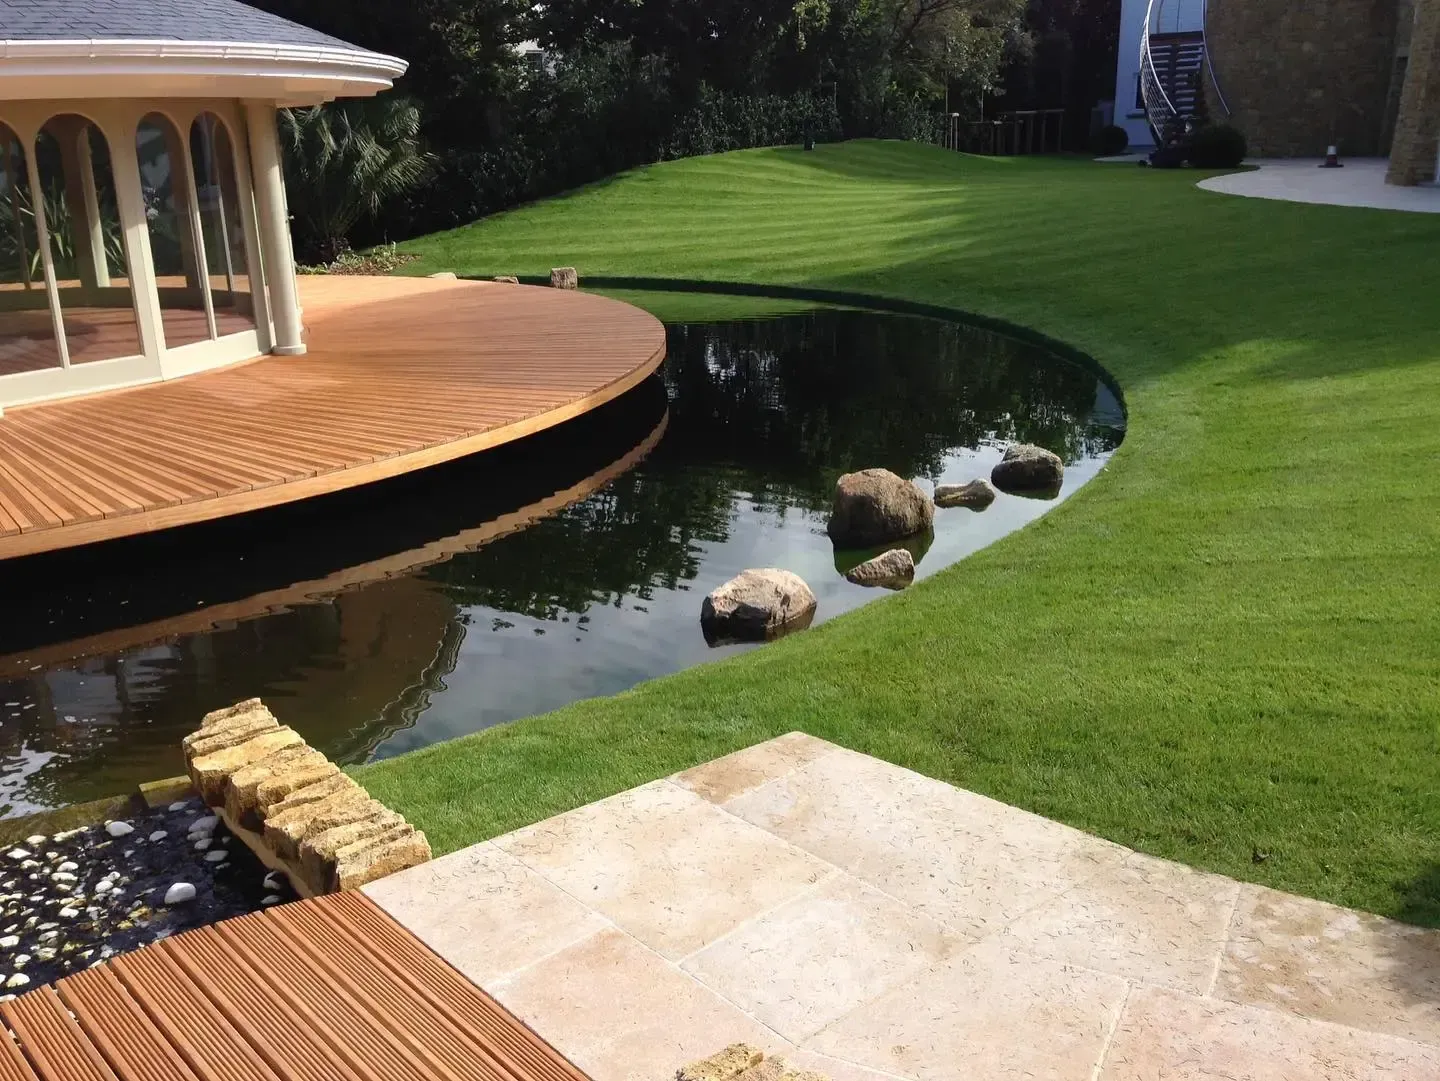
- The Layout: Sweeping, organic curves that mimic nature. Avoid straight lines.
- The Edging Choice: Corten (Weathering) Steel. The warm, rusty patina blends beautifully with bark mulch and timber decking. It creates a "soft" boundary that looks like it has been there for decades.
- Plant Pairing: Native grasses (Carex, Tussock), Flaxes, and wildflowers.
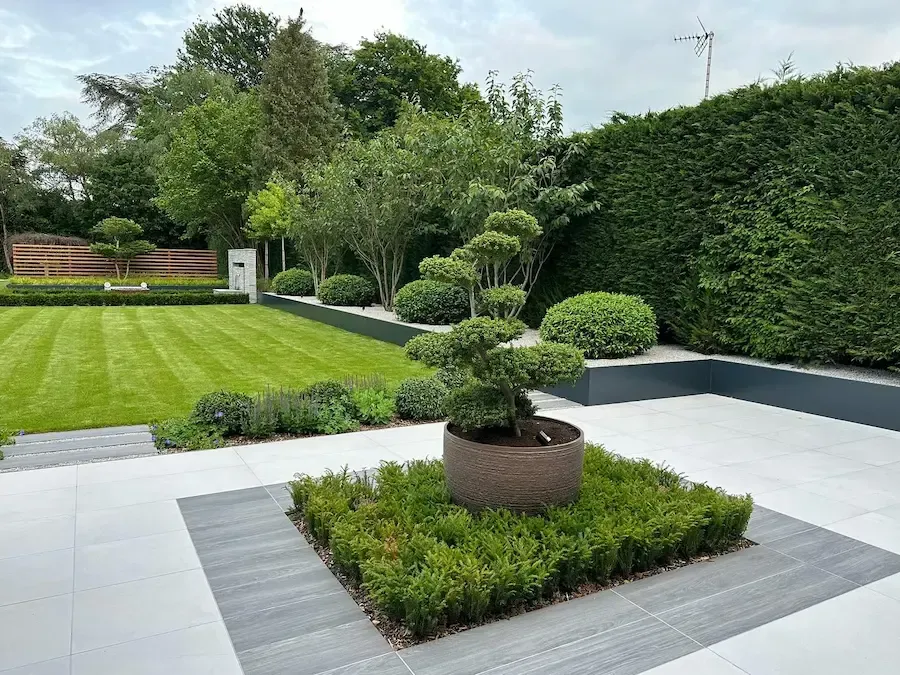
3. The Modern Minimalist
Low maintenance, high impact.
- The Vibe: Auckland city villa or a new architectural build.
- The Layout: Function over frills. Clean separation between grass and hard surfaces (concrete/pavers).
- The Edging Choice: Slate Grey or Black Steel. The goal here is for the edging to be "invisible"—a shadow line that separates the texture of the lawn from the texture of the garden.
- Plant Pairing: Architectural plants like Yuccas, Snake Plants (Sansevieria), or simple mass planting of Star Jasmine.
Step 2: Choose the type of garden edging you need
There are many garden edging ideas on Pinterest, but not all of them survive the New Zealand climate.
- Trench Edging (Spade Edge): The "free" option. It looks great for about two weeks, until the rain collapses the trench or the grass grows back. It requires monthly maintenance.
- Timber Edging: The traditional DIY choice. However, treated timber eventually warps, rots, and looks "chunky." It struggles to handle curves without looking blocky.
- Concrete / Brick: Permanent and strong, but expensive to install and unforgiving. If the ground shifts (which it does in NZ), concrete cracks.
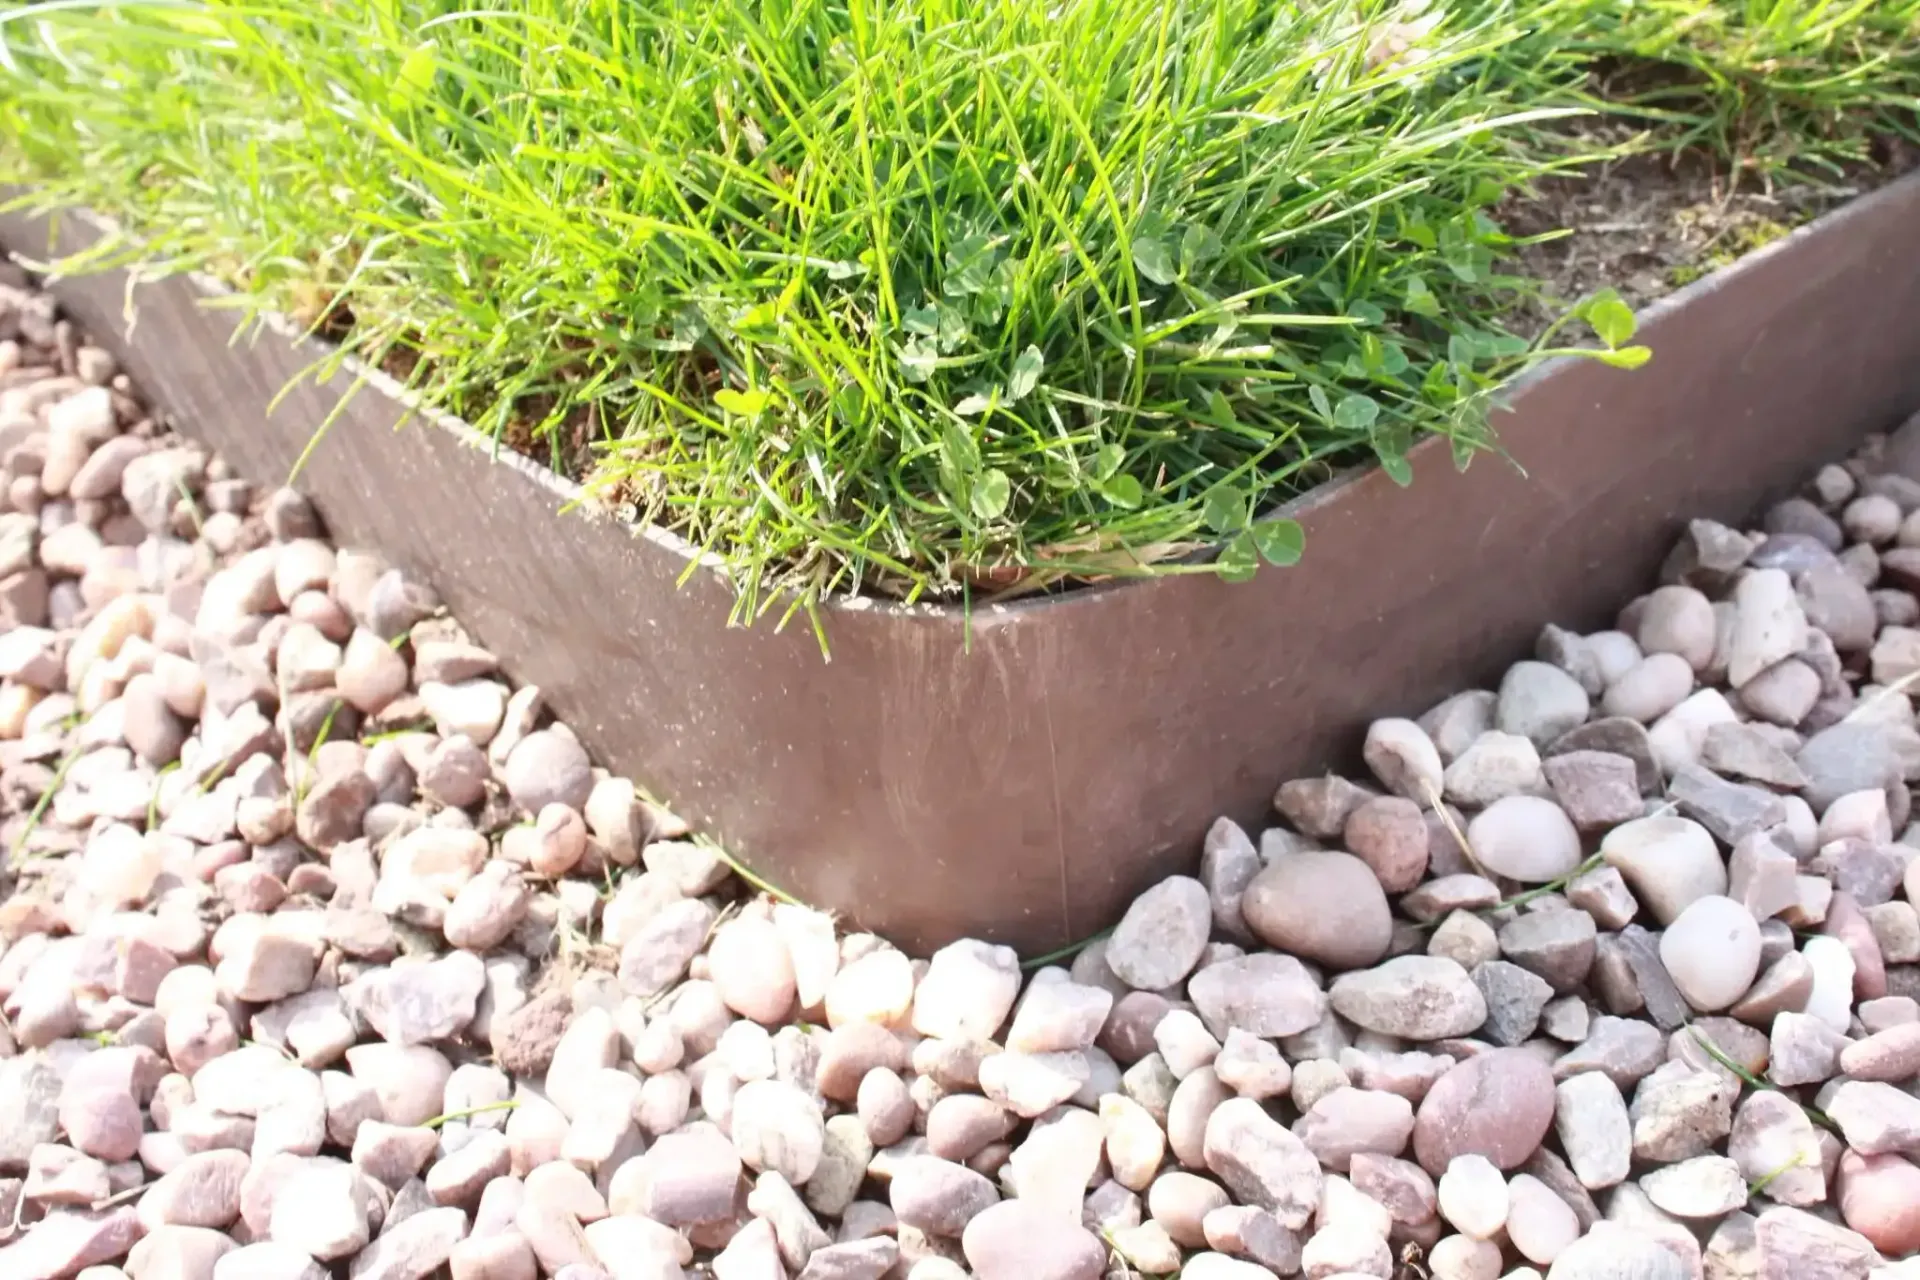
- Steel Garden Edging: This is the professional standard for a reason.
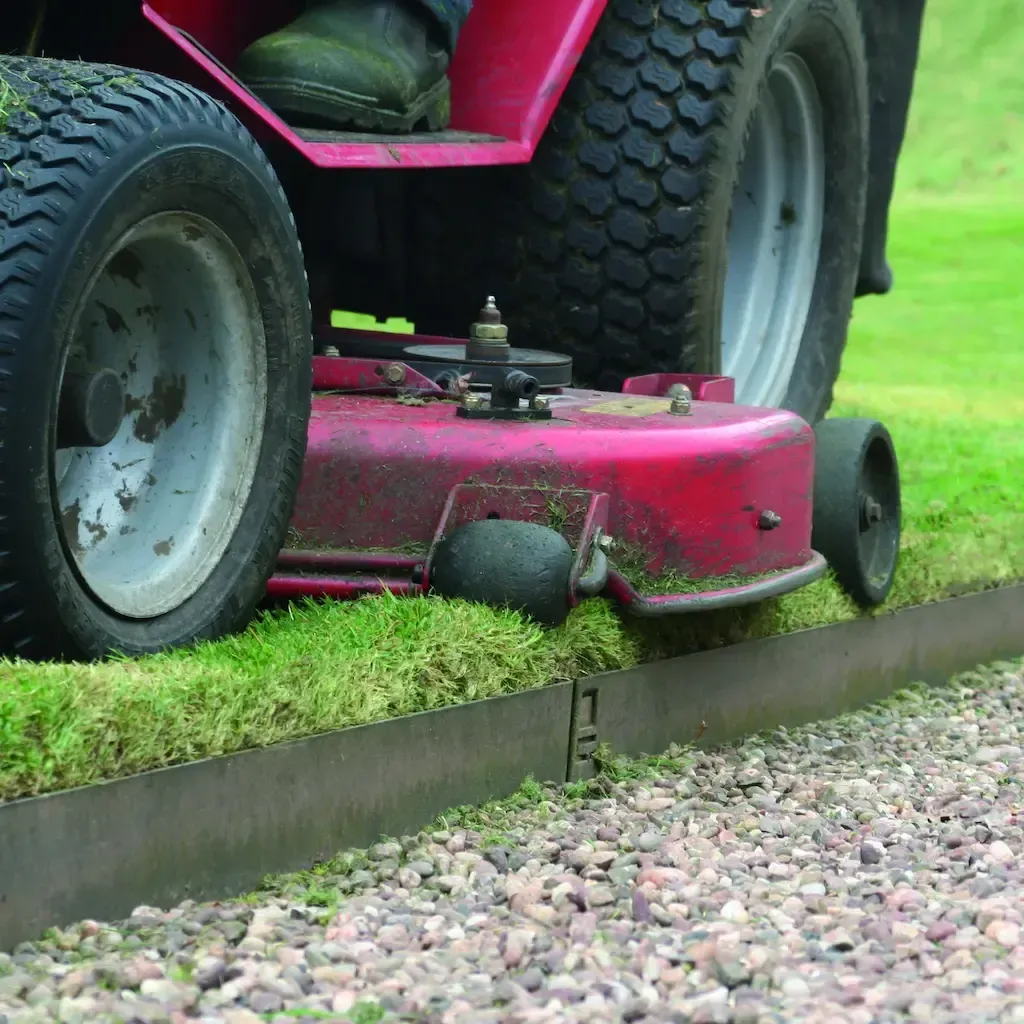
- Durability: It withstands wind, rain, lawnmower blades, and even the weight of vehicles (on driveways).
- Versatility: EverEdge is malleable. You can bend it by hand to create serpentine curves or perfect circles, yet it is strong enough to hold a straight line.
- Zero Maintenance: Once it’s installed, that’s it. No painting, no replacing rotten boards.
Step 3: Plan the garden layout (The Hosepipe Trick)
If you are retrofitting edging to enhance your lawn, you likely have a rough idea of the boundary.
But if you are creating a new bed, planning is essential.
Pro Tip: The Hosepipe Trick Don't guess with a shovel. Grab a garden hose or a long rope and lay it out on the grass to define your new border.
- Stand back: Go inside and look at the line from your kitchen window. Does it flow?
- Simplify the curves: A common mistake beginners make is creating "wavy" borders with lots of small, tight wiggles. This looks messy and is a nightmare to mow. Aim for long, sweeping, confident curves.
- Measure twice: Once you are happy with the hose layout, measure the length so you know exactly how many metres of edging to order.
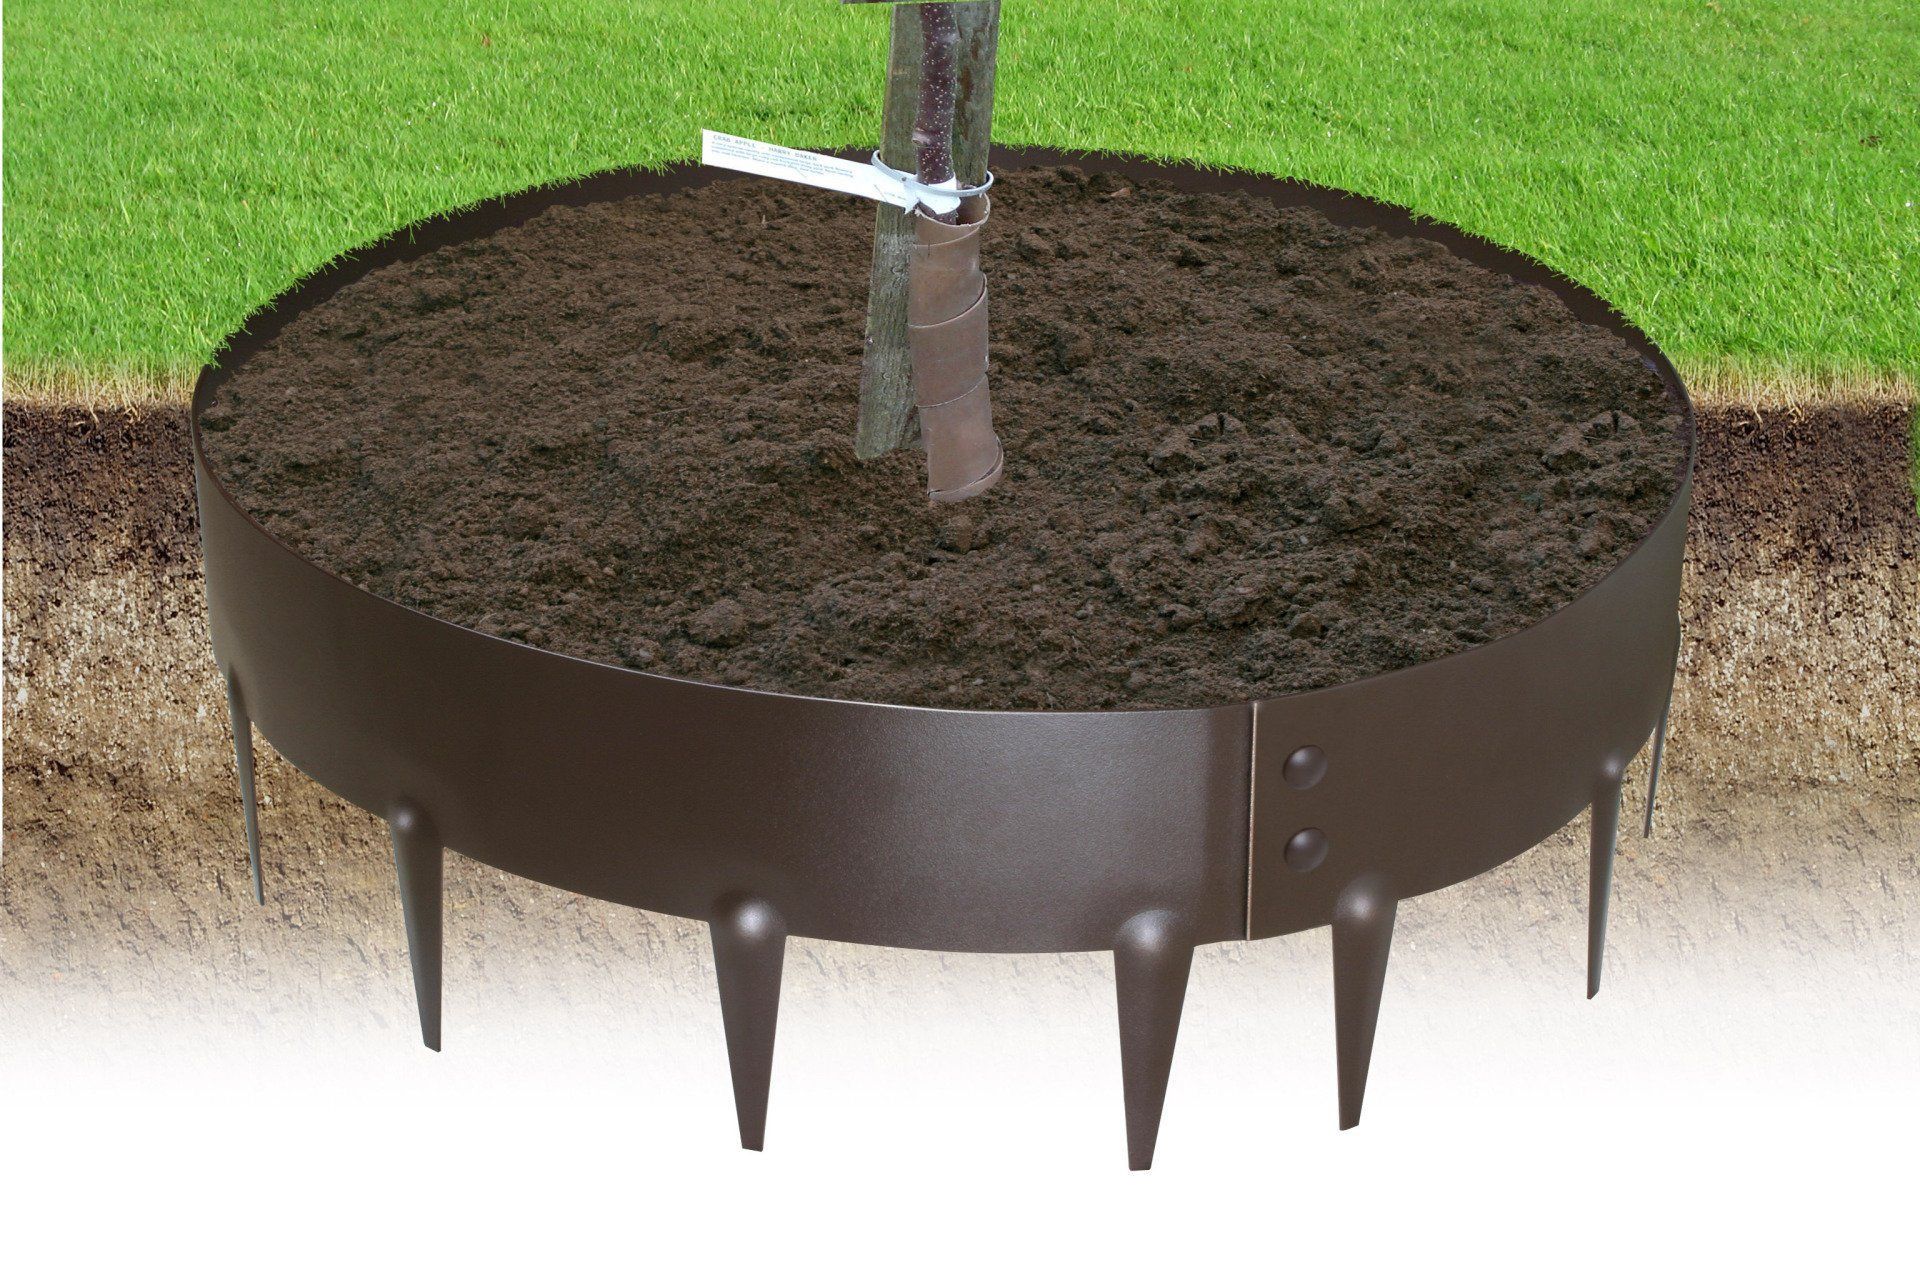
Don't forget the trees For specimen trees (like a Maple or a Magnolia) in the middle of a lawn, grass creeping up the trunk is a major issue. Weedeaters damage tree bark, which can kill the tree. Installing Metal Tree Ring Edging creates a striking circular outline, protecting the tree and making it a deliberate design feature.

Step 4: Work with soil and aspect
Successful planting starts with the soil. New Zealand has diverse soil types—from the heavy clay of Auckland to the sandy soils of the Kapiti Coast or the stony ground of Canterbury.
Using edging to fix soil problems Did you know garden edging can help you manage soil conditions?
- The Raised Effect: If you have heavy clay that drains poorly, you can install 100mm or 125mm deep steel edging and leave it standing slightly proud of the lawn. This allows you to backfill the garden bed with quality topsoil and compost, creating a slightly raised bed.
- The Result: Better drainage for your plants and a more defined visual break between lawn and garden.
Note: If you are installing on a slope, steel edging acts as a mini-retaining wall, preventing soil runoff during heavy rain.
Step 5: Prepare the ground (The secret to easy installation)
Once you have started digging your new garden bed, the temptation is to get straight into installing the edging. However, "future you" will thank you for prepping the ground properly first.
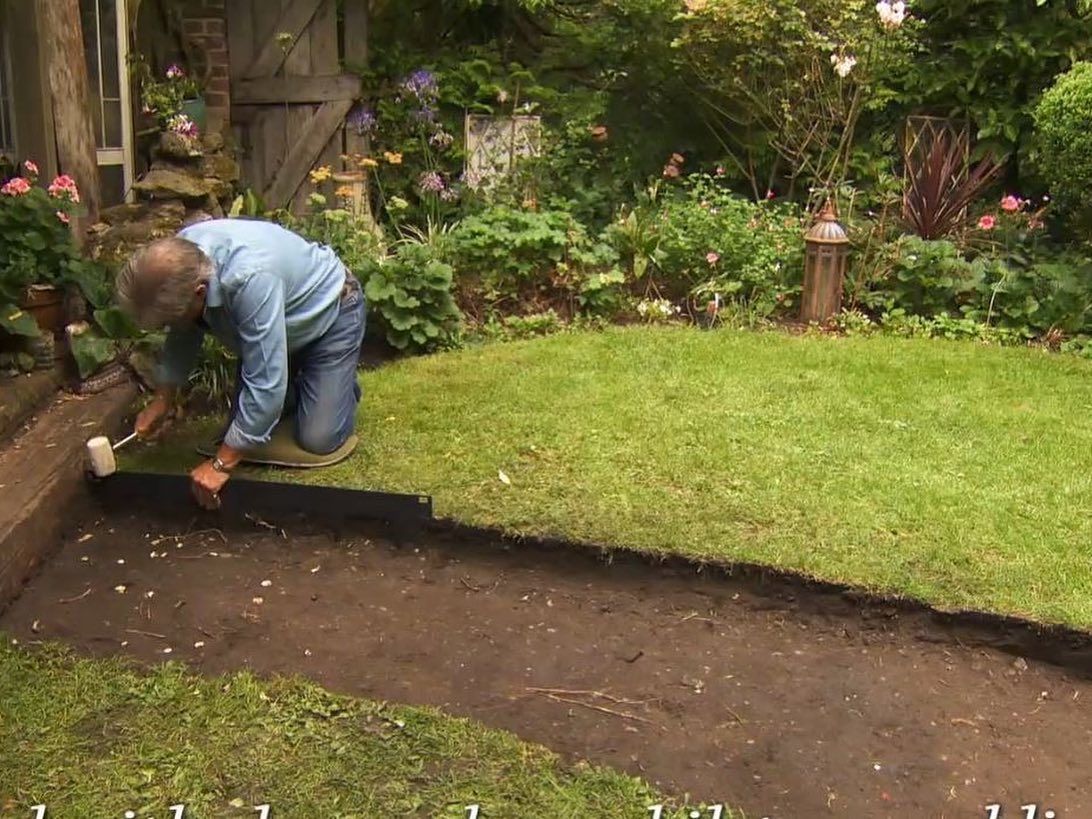
- Clear the line: Remove weeds, old grass, and debris from the trench area.
- Create a vertical face: Use a sharp spade to cut a clean, vertical face into the lawn edge. This gives the EverEdge something to sit flush against.
- Level the bottom: Ensure the bottom of the trench is relatively smooth.
The No-Concrete Advantage One of the massive advantages of EverEdge for DIYers is that it requires no concrete or mortar. The spikes are part of the strip. This means if you decide in 5 years that you want to extend the garden bed, you can simply pull the edging up and move it. You can't do that with a concrete mowing strip!
Step 6: Plan for plant growth
Once the edging is in place, think about how plants will mature within the border.
The "Spillover" Rule A common mistake is planting right up against the new edge. When the plants mature, they flop over the edge and onto the grass, killing the lawn underneath and ruining that crisp line you just created.
- Back: Tall shrubs and structural plants.
- Middle: Perennials and grasses.
- Front: Low groundcovers or seasonal flowers.
Design Tip: Leave a 150mm - 200mm gap of bare soil (or mulch) between the steel edge and your first row of plants. This "negative space" highlights the clean line of the steel and makes the garden look larger.
Step 7: Create flow and unity
Finally, how do you tie it all together?
Repetition is key. If you use Corten steel edging in the front yard, use it in the back yard too. If you use River Stones as mulch in one bed, don't switch to Bark Nuggets in the next bed.
- Grouping: Plant in odd numbers (groups of 3 or 5). This looks more natural to the human eye than even numbers.
- The Golden Thread: Let the edging be the "thread" that stitches the garden together. It can transition from edging a lawn, to edging a gravel path, to forming a tree ring.
Edging is the investment that pays off
You can spend thousands on plants, but if the borders are messy, the garden will never look "finished."
By investing time in these 7 steps, you aren't just making the garden look tidy for this weekend; you are setting up a low-maintenance structure that will last for decades.
Ready to start your project?